End of the nine weeks. Beginning of CDE seasons. National Convention preparations.
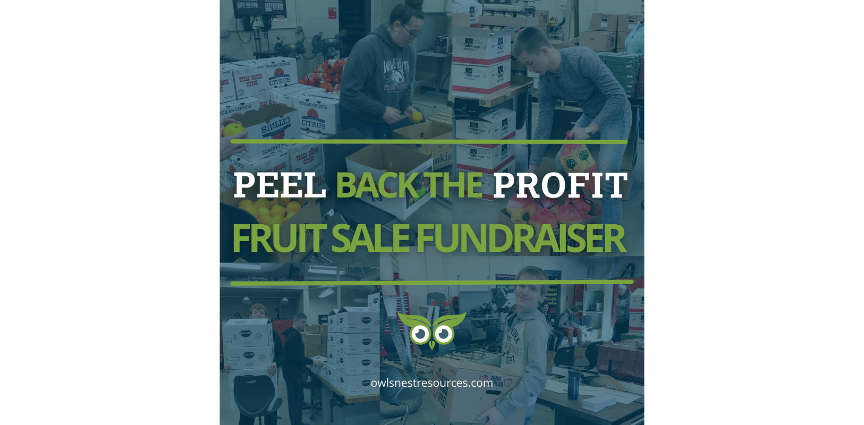
YEP! It’s that time of year to start FRUIT SALES!
Fruit sales was my biggest fundraiser of the year and always seemed to sneak up on me when I had 1,000 other things on my to-do list!
Every year when it finished, I promised myself I would start preparing for it earlier and you guessed it…
It snuck up on me again!
So hopefully we can help you get ahead of the curve, set a plan and RIPEN your fruit sale fundraiser this year!
Here are some of my tips to a successful fundraiser:
DETERMINE PRODUCT LIST
As soon as the product lists and prices are available from your vendors, determine the products included in your fundraiser.
NOTE - the more vendors you use, the more complicated your fundraiser can become, but the more options you might have for customers to support your program. I stuck with citrus, nuts and beef jerky from one vendor, apples from another vendor, and bbq sauce from a third vendor.
I also refrained from products that required a refrigerator or freezer due to the logistics needed to keep items cold.
DETERMINE PRICES & CREATE ORDER FORMS
After you have determined your products, you need to determine how much you are going to sell them for. To do this, it might be beneficial to communicate with neighboring FFA chapters to determine an appropriate price so your items are not drastically higher or lower than others.
I typically tried to profit 20-30% off of all items so it would be worth my time to conduct the fundraiser. Your community is typically willing to pay a little extra for a fundraiser but your prices still need to be somewhat comparable to what customers would typically pay at a grocery store.
Some techniques I used to drive up profit was only ordering boxes of fruit and creating half boxes and bags from these full boxes. For half boxes, I used the lids from boxes and separated them in halves, and for bags I ordered mesh bags from the vendor. Typically the vendor will sell a box of fruit cheaper per pound than a bag. I also sorted and created mixed fruit and gift baskets, which was cheaper than buying them directly from the vendor.
After determining products and prices, I was able to design a Fruit Sale Order Form. I then purchased order forms from a local print shop. I liked to have 3-part carbon copy order forms so I could keep the white copy, students could keep the yellow copy and customers could keep the pink copy. They were a little more expensive but I found they kept my sale more organized and less orders were lost.
PROVIDE STUDENTS WITH FUNDRAISER MATERIALS
Many state associations have specific launch dates where you are permitted to start fundraisers, specifically fruit sales in the fall. I always tried to start my fundraiser as soon as possible so students could compete in reaching customers before neighboring chapters. I provided students with copies of the Fruit Sale Order Form - I asked students to try to sell to at least five customers - and a Fruit Sale Fact Sheet which provides students with the fundraiser information and incentive list.
Incentives can be difficult due to restrictions from your school treasurer so make sure you approve these with your administration prior to starting the sale. My incentives were FFA points, FFA apparel and a gift card raffle. For more information about using FFA points as part of your class grade, read the Draft a Culture of Inclusion blog post.
At this point, I also contacted the school lunch manager to ask if they would like to purchase fruit and serve it in school lunches. The manager at our school was always very supportive and typically purchased $1,000+ from our fundraiser. I used this Fundraiser Invoice template to invoice them and other community organizations who purchased items and needed a formal invoice.
COLLECT STUDENT ORDERS
There are a lot of different methods out there for organizing students’ orders. I found that a spreadsheet fit my organizational style better than online software purchased from a third party vendor. I used a Google Fruit Sale Student Order Spreadsheet. Prior to the end of the sale, I create a separate sheet for each student at the bottom of the spreadsheet. I also added my prices for each item on the TOTAL sheet and the vendors’ prices on the ORDER sheet.
The day after the fundraiser ended, I asked students to bring all of the white copies of their carbon copy order forms to class, where I stored them until after the entire fundraiser concluded - in case there were issues with orders. I printed a blank Fruit Sale Order Form for each student in the program and had students tally up the number of each product they sold, and then determine their total sales.
To double check their math, students should calculate their totals on this blank sheet based on the quantity of each product they recorded from their individual order forms. They should then add the totals on each of their individual order forms to make sure their total sold matched. Students then brought their totaled order form to my computer where they entered the quantity of each item they sold to customers. Their individual sheet from the Google spreadsheet would then automatically total up the price using a formula. They then double checked that this total price matched the price on the blank order form I provided them, as well as when they added all of their carbon copy order forms together. If these three methods do not match, they need to recalculate their orders. Unless your students are all better at “mathing” than mine, be prepared to calculate some up for students.
After all students’ orders are collected, you can see the quantity you need to order on the ORDER tab. Note these quantities are based on the process of mixing your own half boxes, bags, and mixed fruit products. I also typically added 5% to each item to replace any damaged products after shipping and to allow for late orders. The difference between your TOTAL and ORDER tabs is your potential profit. I typically liked to profit between $10,000 and $15,000 from this fundraiser. It is helpful to make this goal public prior to the sale so students can work to achieve it.
There are a lot of helpful links and videos online if your spreadsheet is showing errors or issues after you or your students manipulate the spreadsheet with different products and orders.
SORT FRUIT
Once fruit arrives it is time to sort it. I organized the fruit in the shop so it follows the same order as my order form. This makes it easier during student pick up times.
Like I stated earlier, we sorted all of the fruit into boxes, half boxes and bags. Prior to students entering the classroom, I determined the number of each item contained in a box, half box and bag, and recorded it on the white board in the shop. This helped students stay organized during the sorting process.
I also printed Mixed Apple Box Labels, Mixed Apple Bag Labels and Container Labels, as well as Thank You and Storage Info to be placed in all fruit packages. I also had a student place Product Signs on tables and walls around the shop to help organize the product pick up process so student volunteers knew where all products were located.
PRODUCT PICK UP
This is probably one of the most important parts of the process. I only allowed certain students to help with fruit sales and only these students were allowed to handle pick up. It was not personal, but only responsible, detail-oriented students were allowed to be in charge of organizing student orders during pick up. These students were provided a clipboard, a highlighter and a packet containing all students' order forms from the Fruit Sale Student Order Spreadsheet. I used this Pick Up Volunteer Sign Up Sheet to collect interest and then selected these pick up coordinators from this list.
When a student and/or their parents arrived at the shop garage door, they would approach a student with a clipboard and these students would grab a cart and begin going through their order form, highlighting items as they grabbed them. After collecting all of the items, they would check the order again as students/parents placed the items in their vehicle. This would ensure the correct items were picked up and no additional products were released from the shop.
MONEY COLLECTION
Students were asked to not turn in ANY funds until 100% of their money was collected from customers. They were also asked to only turn in checks and for their parents to write a check for all cash collected. These two requests made the task of counting money and calculating receipts for the student treasurer much easier.
Like all FFA activities and functions, there are countless techniques to find success within your program! These are just a few of the techniques I learned through my decade in the agriculture education classroom. Good luck with your fundraiser and reach out to info@owlsnestresources.com with any questions!